Rasmussen suspension setup explained.
I get many inquiries about how I set up my suspension on my personal sleds. In this explanation I will attempt to help my fellow sledders understand my philosophy on what I think is the ultimate back country suspension setup. My suspension setup is somewhat unique to the rest of the industry and it has come over many years of riding hill climb competition sleds and backcountry sleds as well. My suspension setup is primarily developed for off trail, backcountry and deep snow operation and is designed to promote less rider effort to maintain control of the sled when using proper technique and good form.
 First off I must defend the OEM’s in that they develop suspension calibration for the average rider snowmobiling in average conditions. The ski suspension is soft and intentionally easy to roll up on edge for hill side operation. Bare in mind that the calibration is setup to perform with the mindset that the rider will be operating the sled with both skis on the snow and sharing the load of the sled. The rear suspension is also somewhat soft and calibrated to soak up the bumps for average riders which it does very well. Combined with the T-motion and flex edge track offered on the Ski Doo Summit Gen 4 rev, this sled is very easy to roll up and ride on edge for traversing hill sides even with improper rider form.
As I describe my preferred suspension setup the reader must understand that this setup may not be desirable for all riders and that my setup is specifically configured to conform to the technique which I teach and is geared toward more aggressive riders. When setup correctly this suspension will give the rider a more positive feel for how the ski and track are engaged in the snow. It will improve hillside operation helping to prevent washout (when the sled wants to turn up hill) while traversing a hillside. It will better prevent over transfer, but allow the track to stay engaged in the snow providing better traction. And I will help to prevent A-arm damage due to not enough suspension capacity while riding on edge or on one ski.
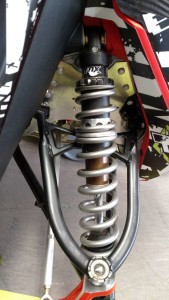
With the ski suspension I prefer a firm but not too stiff ride. I like the chassis to remain flat while cornering and while on edge I like that one ski will carry the whole weight of the sled without being too far into the stroke of the shock. I accomplish this using a regressive rate coil over spring package. While the KYB shocks on the Summit X model are very adequate for my setup, I prefer the Fox Factory IFP R. The regressive spring package offers a very firm initial spring rate to prevent chassis from rolling in turns and as the suspension compresses the spring rate actually reduces preventing an over stiff suspension that won’t collapse. Then at the end of the stroke the spring rate rapidly increases preventing bottom out.
All of this is accomplished using two springs, the first spring is locked out at initial compression preload causing only the second spring to be active. Part way into the stroke both springs become active reducing spring rate. This allows the suspension to continue to collapse without getting over stiff. In other words the suspension stays free. This article is not intended to explain spring theory, however this deserves an explanation since I want you to fully understand how this happens. When you add coils to a spring it will always reduce spring rate making the spring easier to compress. This should not become confused with preload as preload does not change spring rate; it simply changes the load that the spring can carry at the beginning of the stroke. Then as the suspension nears full stroke the first spring again becomes locked out greatly increasing the spring rate and preventing bottom out. Go to my web site for an animated graphic of how this all works: https://www.riderasmussenstyle.com/brets-tech-tips/
I want my sled to perform at its peak in the most adverse and extreme technical situations, therefor the ski shocks are calibrated to carry the load of the sled on just one ski. When I traverse a hill side on edge, the suspension will be able to carry the weight of the sled and still have working travel left. This will allow the suspension to collapse over an obstacle such as a log or stump that is hidden in the snow without taking out the whole suspension.
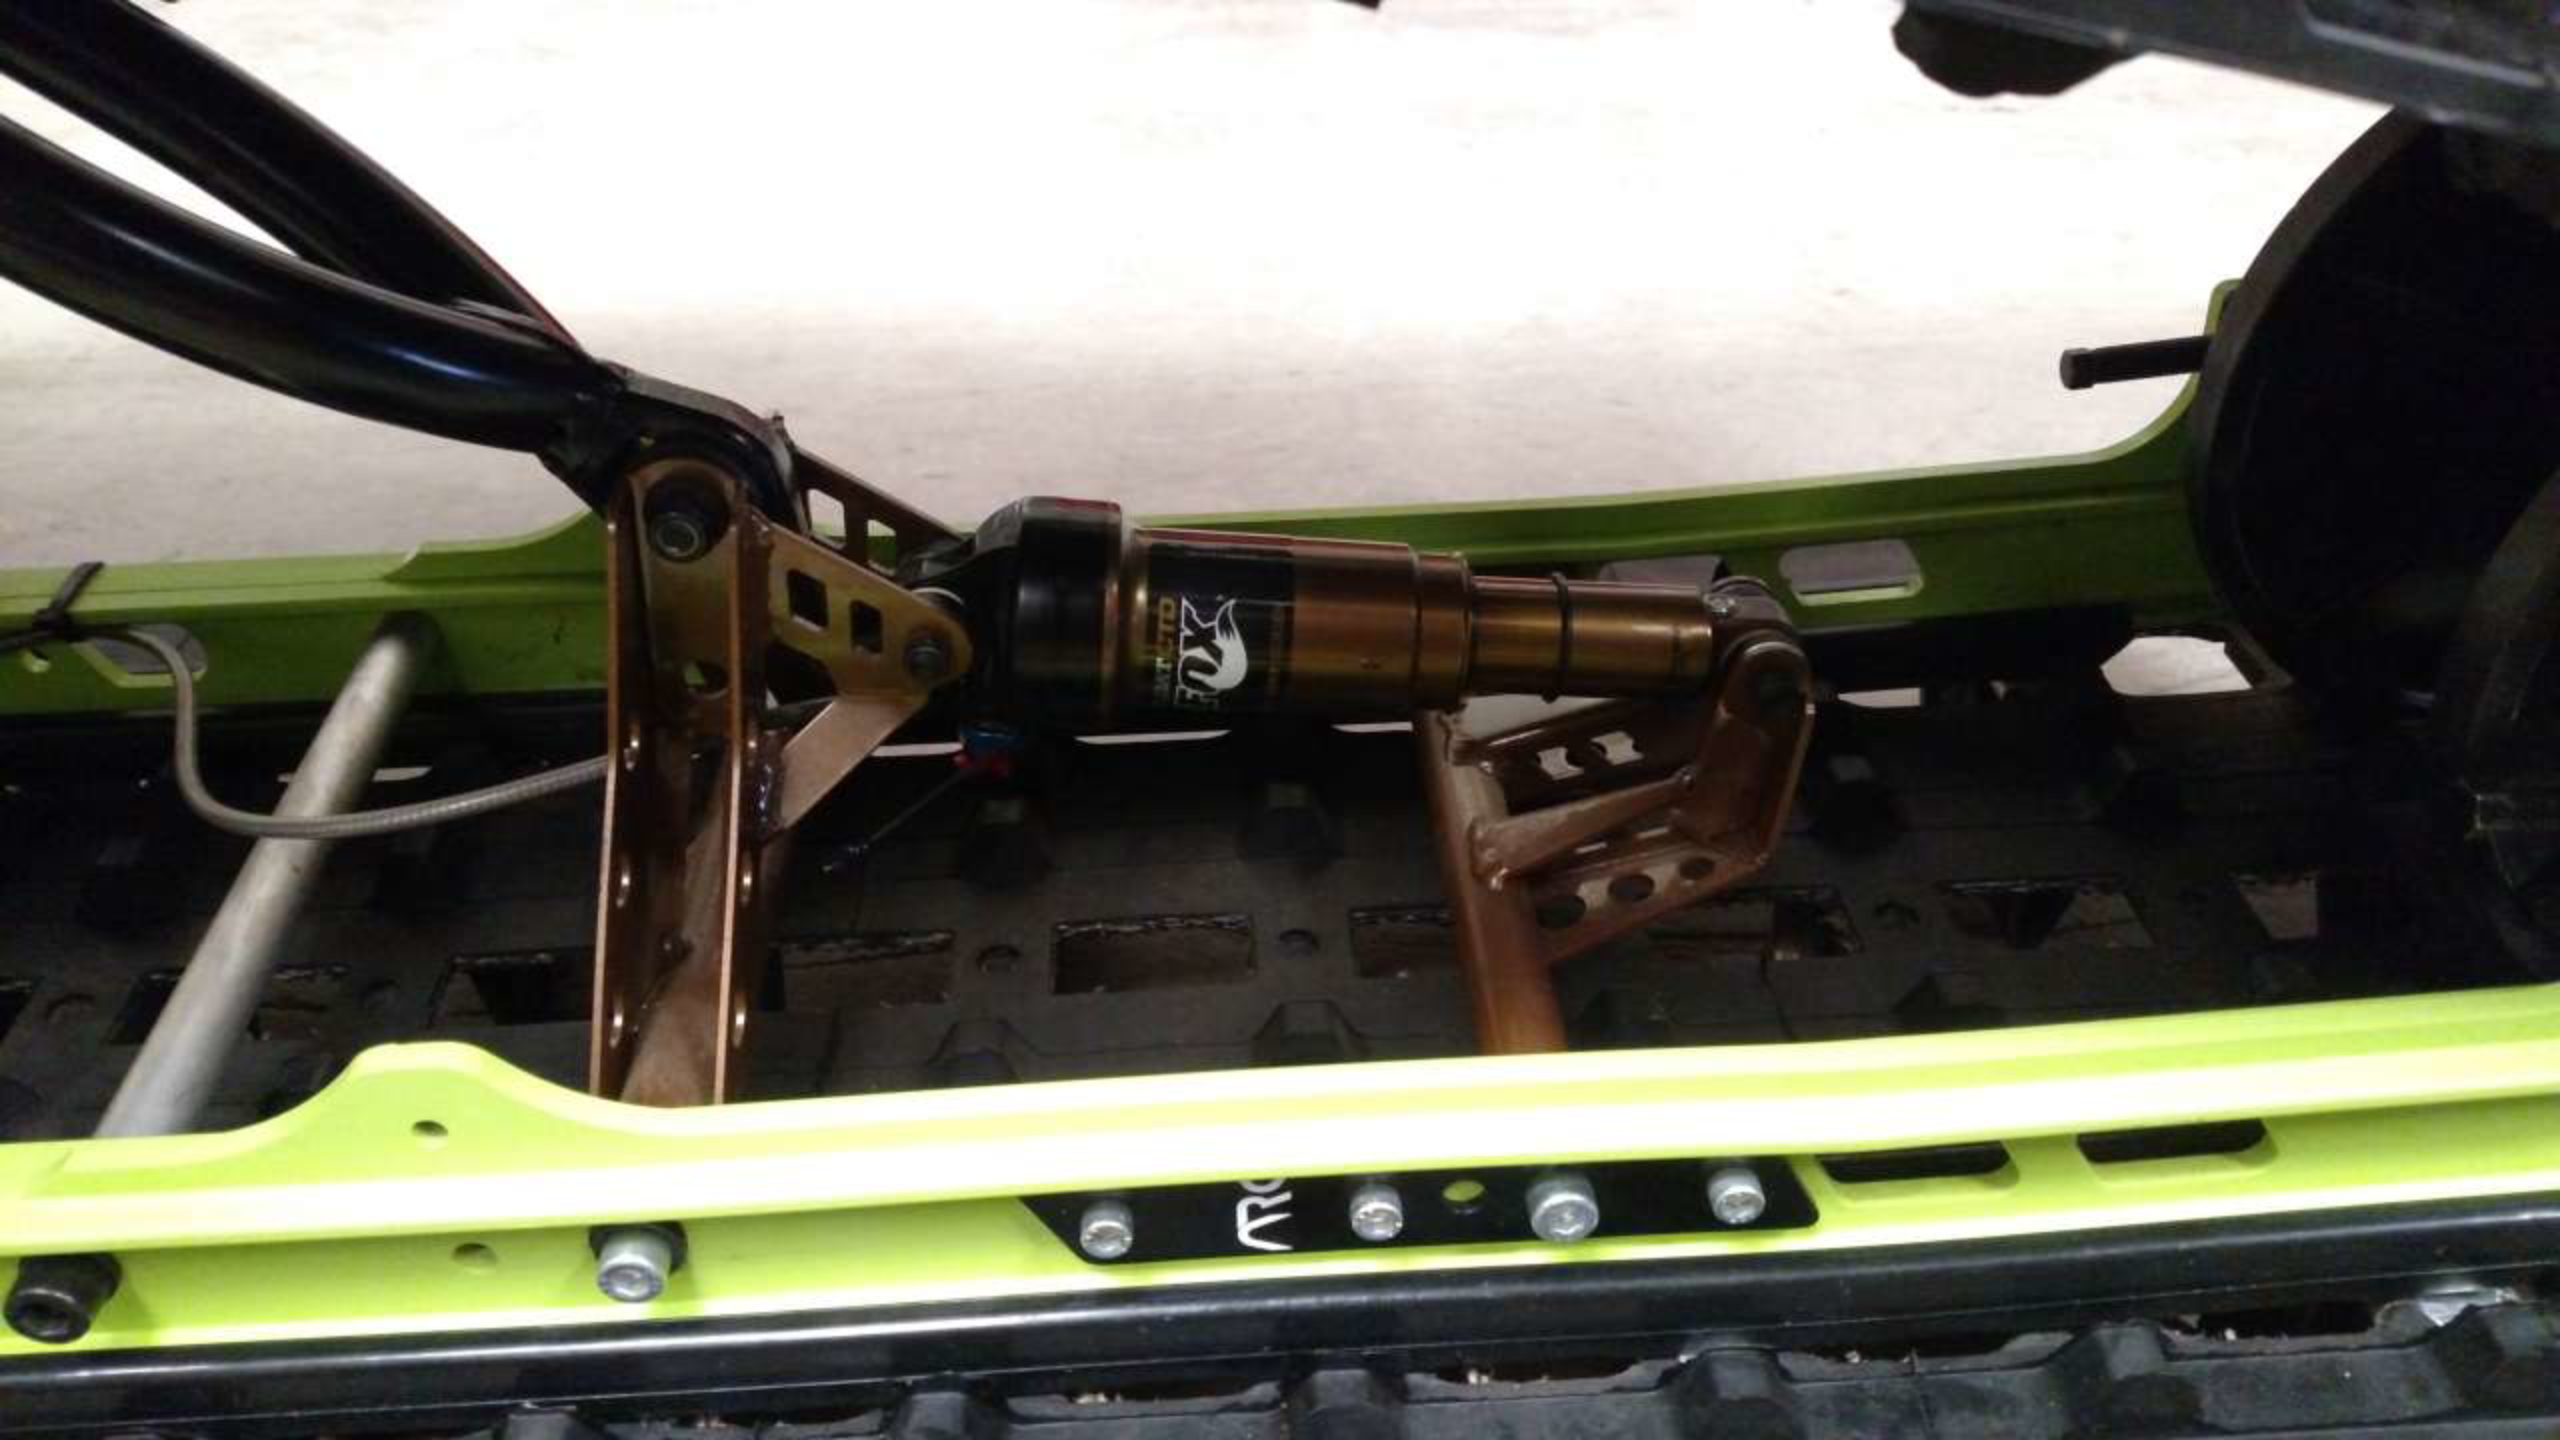
As for the rear suspension, I like the center arm to fall out helping the sled to maintain an edge. Most suspension tuners will tell you that the limiter strap on the center arm is used to control transfer or ski lift. I like to lengthen my limiter strap maximizing the distance that the center arm can fall out. This makes holding a hill side for extended periods much easier. For the spring I will install a progressive rate spring that starts at 140 PSI per inch of travel and finishes at 400 PSI per inch of travel. I also install a very soft helper spring that allows the suspension to collapse very easily for the first bit of travel allowing the track to climb out on top of the snow rather than trenching. I install this whole package with just enough preload to hold the spring retainer in place. I end up with a center shock that is initially very soft and plush, but very hard to bottom out when casing a mogul.
The rear arm is where I am able to control sled transfer or ski lift. I like my sled to lift the skis a few inches off the snow and hold, giving me maximum control and allows me to pick a line through technical terrain. Most sleds over transfer and are very difficult to control and remember the first thing most riders will do is to pull the limiter strap up. While this will control transfer, it will make the sled harder to control because it will be more difficult to hold on edge. Additionally shortening the limiter strap will prevent the track from being fully engaged in the snow and will reduce traction. By using a much stiffer rear arm spring and a slider block that changes the leverage point on the spring making it seem progressive, I can control the transfer. This system allows an initial soft ride and prevents over transfer. When calibrated right, the rear of the sled will squat to the point where the slider block changes leverage points on the spring and then hold. At this point the sled weight is all transferred to the rear arm spring and the spring is heavy enough to handle the load and should not bottom out.
This suspension calibration is such that the springs do much of the work reducing heat buildup in the shocks. Because we are relying less on the shock hydraulics to do the work the springs should be doing the suspension becomes much freer moving. The skis and track are engaged more positively in the terrain and the rider has more control.
Click the following links to learn more about the Rasmussen Fox RCS Suspension Installation:
Part 1
Part 2